Everyone can use this coupon code: ETSO4BG0 for extra discounts on www.etradesupply.com for order over $50, and it won’t be expire until Dec 31, 2014.
The Apple iPhone 6 features a 4.7-inch display and is protected by fingerprint-resistant oleophobic coating and shatter proof glass. If your iPhone 6’s screen becomes cracked, sending it to a repair shop may not be affordable for you. Perhaps a DIY repair is a better choice if you have some experience or repair skills. Now this tutorial shows you how to replace a broken iPhone 6 screen step by step.
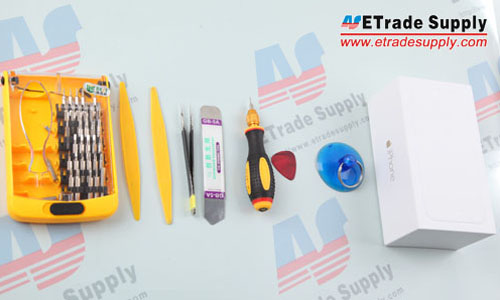
Tools Needed:
Screwdriver
Plastic Spudger Tool
Tweezers
Case Opening Tool
Suction Cup Tool
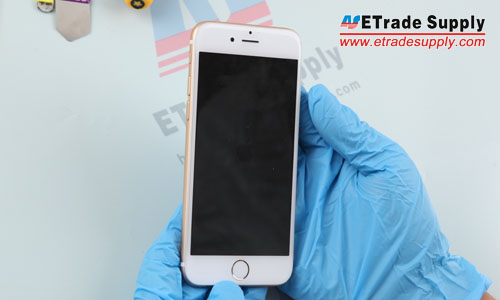
1. Power off the Apple iPhone 6.
1. Power off the Apple iPhone 6.
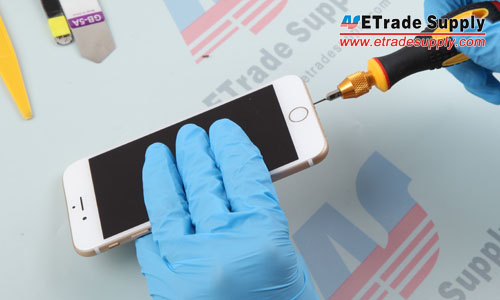
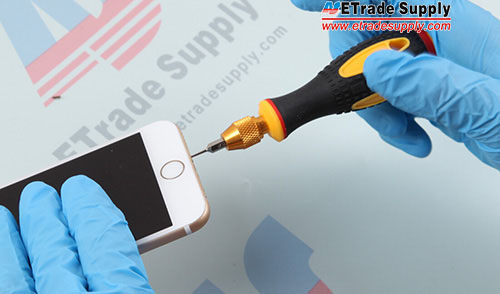
2. Undo the 2 charging port screws. (Notice: there’re lots of different screws inside, mark or separate them when disassembling to prevent confusion.)
3. Use the suction cup tool and case opening tool to separate the LCD assembly from the rear housing assembly. (Notice: be careful not to damage the flex ribbons.)

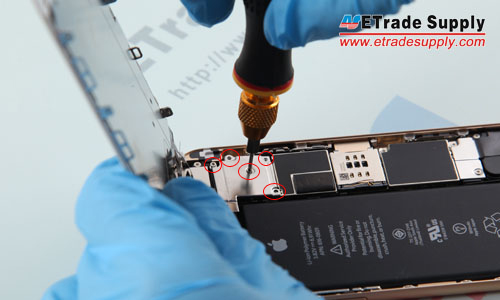
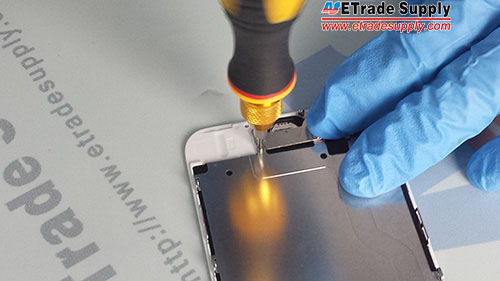
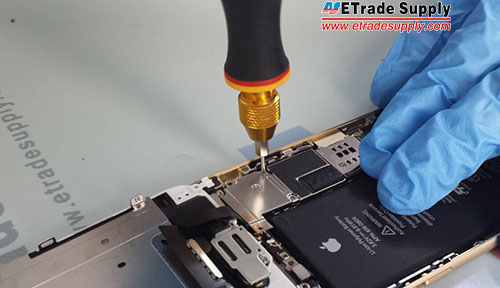
4. Undo the 5 screws that lock the metal cover above the LCD assembly flex ribbon connectors.
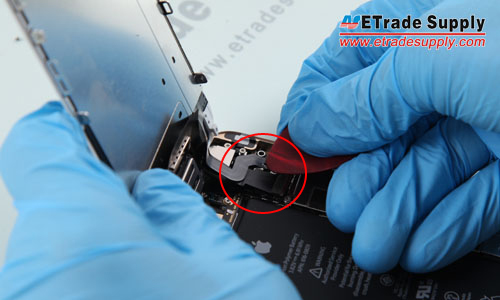
5. Carefully pry up the 3 connectors.
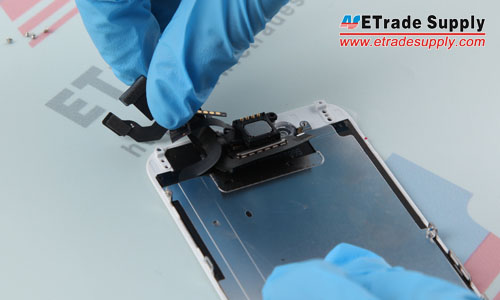
6. Undo the 3 screws from the home button bracket.
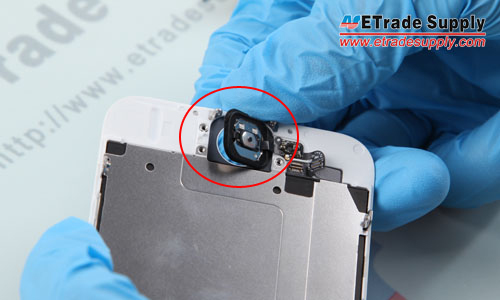
7. Carefully pry up the home button flex ribbon connector, gently poke the home button and take it out.

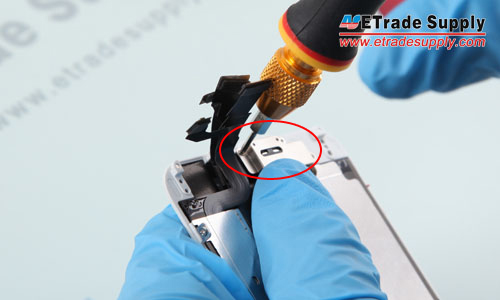
8. Undo the 2 screws that lock the metal cover above the earpiece speaker and front facing camera.
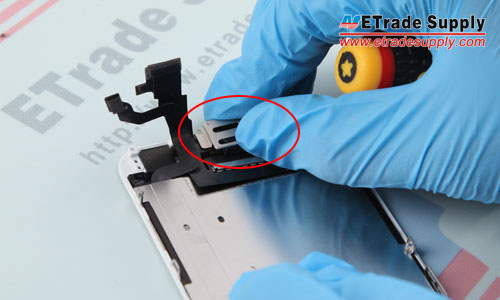
9. Remove the front facing camera and the earpiece speaker.
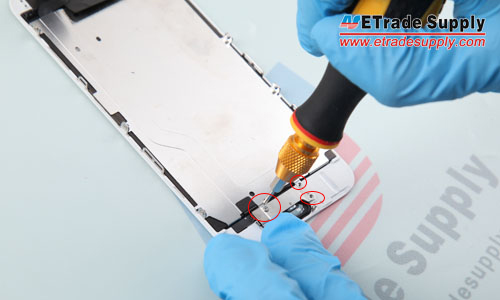
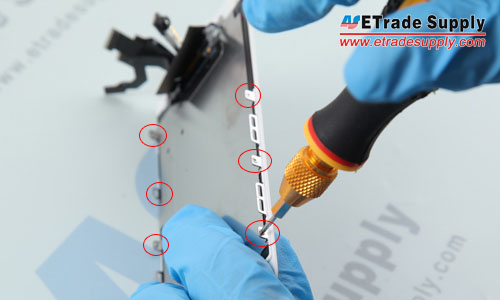
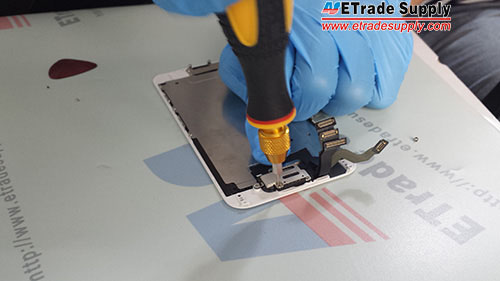
10. Undo the 6 screws that lock the LCD frame and LCD back plate.
11. Use tweezers to carefully pick up the flex ribbon connector and remove the LCD back plate.
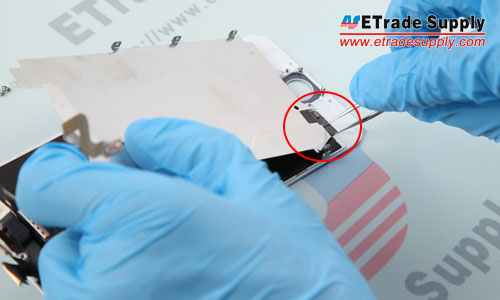
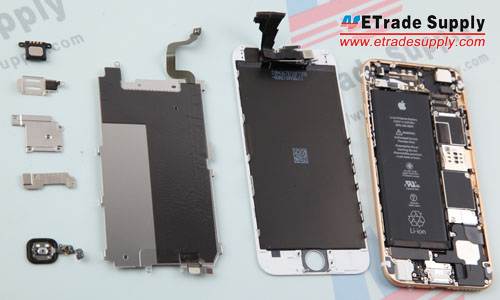
12. Separated the LCD assembly, metal plate and rear housing assembly.
13. Reassemble the metal plate and the new LCD assembly replacement, fasten the screws. Then assemble the home button.

14. Replace the metal cover and lock it with the screws.
15. Reassemble the earpiece speaker and cover the metal bracket, then fasten it with the screws.
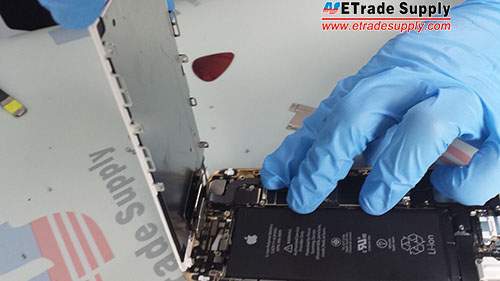
16. Connect the LCD screen assembly and the rear housing assembly.
17. Replace the metal cover above the connectors.

18. Lock the metal cover with 5 screws.
19. Assemble the LCD screen assembly and the rear housing assembly.
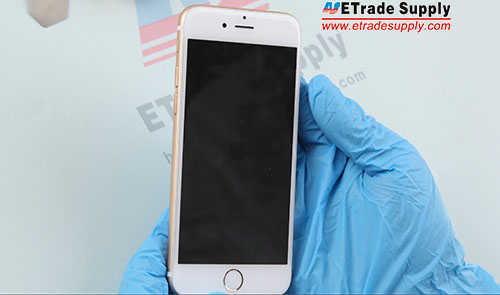
20. Fasten the 2 charging port screws. Congratulations you’ve completely replaced your iPhone 6 screen.
No comments:
Post a Comment