Tuesday, August 27, 2013

5.68 Inches Samsung Galaxy Note 3 Display Leaked in HD Photos

It is only one week left till September 4th, which is a big day for Samsung as the Korean tech giant is going to introduce its flagship of the second half of the year at IFA 2013. That is the third generation of Samsung Galaxy Note series. Rumors about the display size have been floating for a few months, 5.5, 5.7, 5.9, 6.1 or 6.3 inches? Well, the rumors can stop here and let’s reveal the answer now.
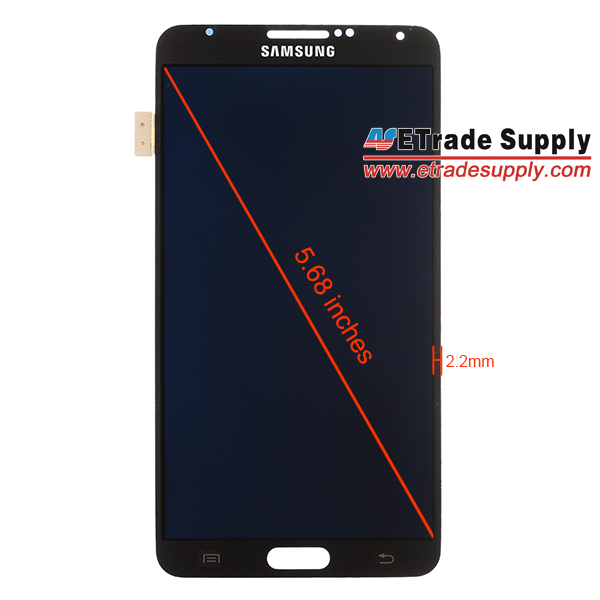
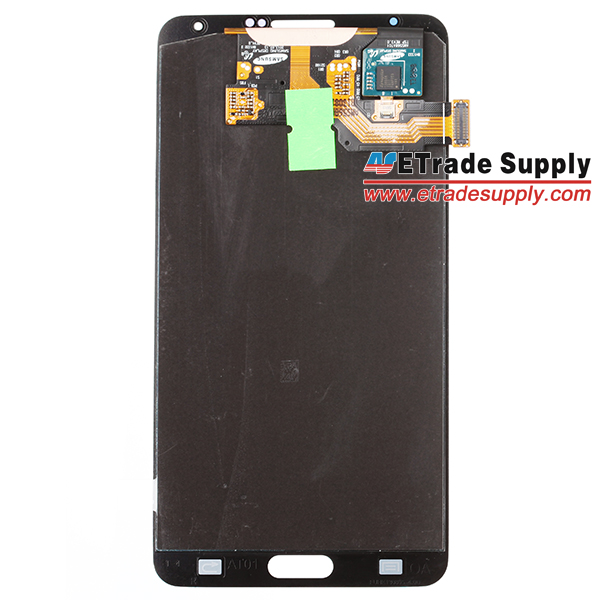
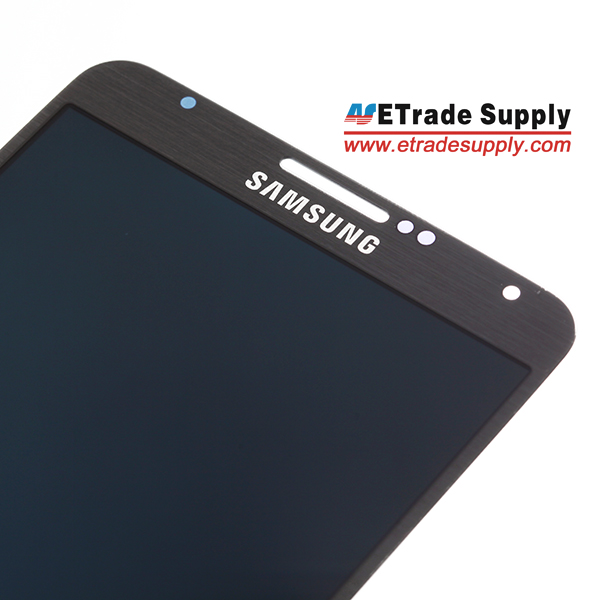
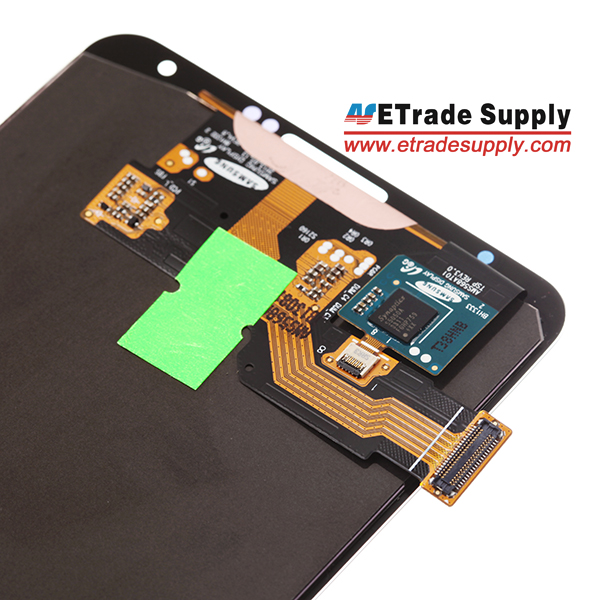
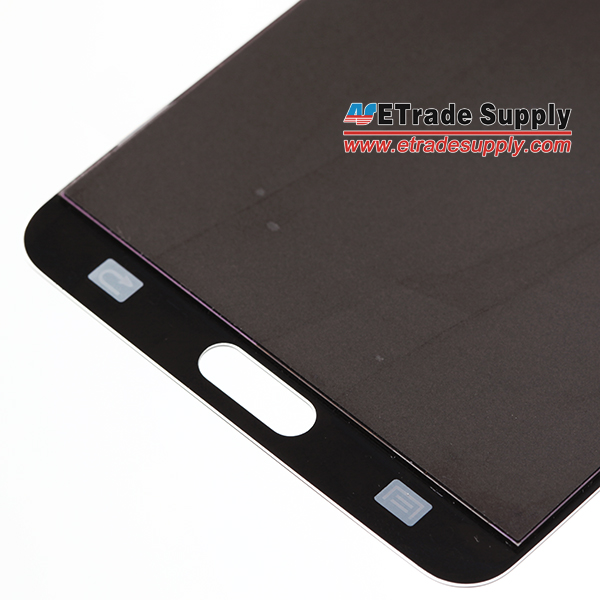
Today we manage to get our hands on the Samsung Galaxy Note 3 Display Assembly. After having a precisely measurement, we get that the display size is approximately 5.68 inches. Compared with the Galaxy Note 2, the Note 3’s screen design has some small changes. The shape of the corner is more like the Galaxy S4 and the boarder is slimmer, which is only 2.2 mm. The total thickness of the display is merely 1.8mm.
Galaxy Note 3 Display Assembly (1) Galaxy Note 3 Display Assembly (1)Galaxy Note 3 Display Assembly (2) Galaxy Note 3 Display Assembly (3) Galaxy Note 3 Display Assembly (4) Galaxy Note 3 Display Assembly (5) Galaxy Note 3 Display Assembly (6)

Monday, August 19, 2013

How to Repair BlackBerry Z10 Damaged Components

According to the reports from some phone forums and scientific websites, there are a few BlackBerry Z10 problems the users are facing. Lots of users published the threads that “how to repair the device’s internal parts?” These BBZ10 internal parts include BlackBerry Z10 cracked screen, malfunctioning speaker, or damaged charging port. Also, many people asked “where are the professional Z10 repair guides (like Z10 take apart video or article) and excellent OEM parts for BlackBerry Z10”.
Now, you don’t need to worry about the above-mentioned BlackBerry Z10 problems. You can repair a cracked, shattered or damaged screen and other internal parts on your phone with this detailed DIY disassemble tutorial, this guide will walk you through each step of taking apart your BlackBerry Z10 and show how to change the damaged components.
All the BlackBerry Z10 replacement parts and tools can be found on our official online store. Welcome to watch our BlackBerry Z10 take part video if you still can’t understand this tutorial.
How to Solve BlackBerry Z10 Problems

This DIY disassembling tutorial will help you replace the following BlackBerry Z10 part(s):
• BlackBerry Z10 LCD Screen Replacement
• BlackBerry Z10 Touch Screen Digitizer Replacement
• BlackBerry Z10 Rear Housing Replacement
• BlackBerry Z10 Middle Plate Replacement
• BlackBerry Z10 Charging Port Replacement
• BlackBerry Z10 Ear Speaker Replacement
• BlackBerry Z10 Rear Facing Camera Replacement
See the following Link:

Sunday, August 18, 2013

BlackBerry Z10 Porsche Design Middle Plate

http://www.etradesupply.com/blog/leaked-blackberry-z10-porsche-design-middle-plate/

At the beginning of this month, there were reports showing that a prototype of the possible Porsche Design BlackBerry which is said to be an edition of BlackBerry Z10. And today we are lucky to get from our reliable sources some photos of a middle plate of this Porsche Design BlackBerry Z10. Since it is an edition of BlackBerry Z10, we have made a comparison as below:

BlackBerry Z10 and Porsche Middle Plate Comparison

From the picture we can see that the inner design of the Porsche edition middle plate is the same as the BlackBerry Z10 A Version’s middle plate, and only the frame design has been changed.  Maybe there will also be two versions for the Porsche edition.
According to previous report, this new Porsche Design edition will be called BlackBerry P`9982 and will again feature a unique UI on top of BlackBerry 10. The availability is estimated to be in the middle of 2014 with a price around $2000.
BlackBerry Z10 Porsche Edition Middle Plate- (1) BlackBerry Z10 Porsche Edition Middle Plate- (2)

Saturday, August 17, 2013

How to Replace Nexus 4 Back Cover

Replace Nexus 4 Back Cover

http://www.etradesupply.com/blog/how-to-replace-cracked-nexus-4-battery-cover/

The Google Nexus 4 has gained positive reviews overall with the advantages of impressive features and affordable price. However, the shortcoming is that the front and back glass tend to break easily. Many users complained they cracked the back glass on their N4. However, the damage caused by personal factor is out of warranty. LG won’t replace it for free. Besides, it’s difficult to replace the Nexus 4 back cover glass lens alone. Fortunately, you can replace the whole Nexus 4 back cover easily yourself according to our step-by-step tutorials.
How to replace the cracked battery cover on the Nexus 4
Preparation:
One T5 Torx Screwdriver
A Triangle Case Opening Tool
A New Replacement Nexus 4 back cover (Please note that there are two versions of the Nexus 4 back cover available online. One is with NFC, the other is without NFC. If you want to make this replacement work easier, you’d better get a new N4 battery cover with NFC.)
Step 1
Turn off the Nexus 4, then use eject pin to remove the Nexus 4 SIM card tray from the device.
remove the Nexus 4 SIM card tray
Step 2
Use the T5 Torx Screwdriver to remove the two screws at bottom of the N4.
remove the two screws at bottom of the Nexus 4

Step 3

Use a triangle case opening tool to gently open the Nexus 4 battery cover by prying along the edge of the case, starting at the bottom corners. Then remove the broken back cover.
open the Nexus 4 battery cover

more

Friday, August 9, 2013

How to DIY a Paper Case for iPad 4


Many people like the way that iPad looks without a protective case. However, we know it’s obviously inadvisable to carry an iPad without a case, as we will never forgive ourselves once we crack it if the device has no protective case.
If you’re interested in the cases for your tablet, making a case by yourself is a great way to personalize your device without losing its original design. It’s even better than the expensive cases from an online shop. This tutorial teaches you how to use the basic tools and some materials to DIY a cheaper case. The idea of this tutorial is very simple and it won’t take you much time. Make this DIY iPad case and enjoy your original iPad! Enjoy!
How to DIY a Paper Case for iPad

Tools & Materials:
1. A book
2. Paper Knife
3. Adhesive& Glue
4. Pencil

Steps One: Draw the “frame” of the iPad
Select a book which has a bigger size than the iPad. Turn the cover page of the book, and then draw the “frame” of the iPad with the pencil on the first page.

more: http://www.etradesupply.com/blog/diy-paper-case-ipad-4/