Sunday, December 28, 2014

10 Of The Most Annoying Galaxy Note 4 Problems

http://www.etradesupply.com/blog/10-of-the-most-annoying-galaxy-note-4-problems/

use this coupon code: ETS7H4XW for extra discounts on www.etradesupply.com for order over $50, and it won’t be expire until Feb. 10th, 2015.
Many of us spent lots of time with our phones each day. What happens when our phones decide to complicate things and make our lives harder. Well we’ve outlined some of the most frustrating things when dealing with the Galaxy Note 4, and some solutions to go along with it. So take a breather and chill out things will all be ok.

10. The Gap
samsung galaxy note 4 replacement parts
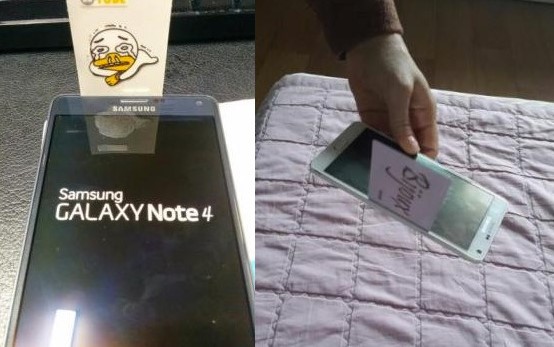
The Problem: After the launch of the Note 4 many users complained about a thin gap between the screen and the frame on all sides besides the bottom. Quickly dubbed Gapgate by many netizens, pictures and videos of themselves sticking business cards and the like in the gap started popping up all over the web.
It seems though that Samsung was aware of the issues as the user manual states “A small gap appears around the outside of the device. This gap is a necessary manufacturing feature and some minor rocking or vibration of pats may appear. Over time, friction between parts may cause this gap to expand slightly.”
An official spokesperson from Samsung stated, ”The reported issue does not impact the functionality of quality of the Galaxy Note 4,” in response to a TrustedReviews interview. “We assure out customers that all Galaxy Note 4 unites meet our strict manufacturing and quality control standards.
What you can do:
-Many of you most likely didn’t notice the gap until now and probably wouldn’t have unless someone pointed it out to you. Really the only option you have is to ignore it, or return it if it really gets under your skin.

9. ‘OK Google’ Glitch
note 4 glitch
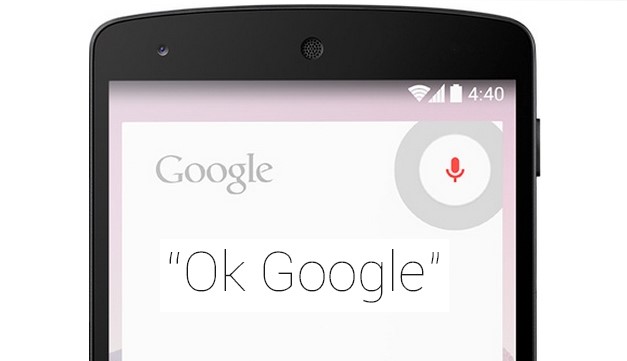
The Problem: Some users have been reporting issues with getting voice commands to work, specifically ‘OK Google.’ Most users report being able to use the command after initial set up, but then it stops working after a couple of days, other reports that the “Always on” function (that feature that allows you to use it even if the phone is off) doesn’t work properly.
What you can do:
Generally there should be no problem between the two, but some users have reported solving the problem by turning off “Voice wake-up” in the settings menu of “S Voice.” Some other users, though, have reported that the opposite is true, and their phone requires the feature to be on for “OK Google” to work.
If that doesn’t work you can also try these potential solutions:
-Go to the language and input selection of your settings menu and under the “OK Google” option in “Voice Search” (Settings> Language and input > Voice search> “OK Google”) make sure “Detection” is set to Always on. If you’re turning that setting on restart your phone, and try it again.
-If none of the above tips help there is a possibility that a 3rd party app is causing trouble. We recommend checking your apps one-by-one. Start with anything that accesses the notifications. That, or you could perform a factory reset and reinstall your apps one-by-one till you find the one causing problems.

8. Random Restarts
The Problem: Some users have reported rebooting issues with their Samsung Note 4. At random intervals the phone will restart itself without any warning or any obvious cause.
What you can do:
-One of the first things you can check is your Micro SD card, if you have one. Remove it from your phone and check to see if the random reboots still occur. If they have stopped then backup all the data on your computer, and then format the card with your Note 4 though the Settings> Storage> Format SD card.
-Next step would be to try a factory reset. Backup everything and then go to Settings> Backup and reset> Factory data reset> Reset device> Erase everything.
-If neither of the other steps worked we recommend that you contact you(r) retailer, carrier, or Samsung and arrange to have your phone replaced.

7. Missing Menu Key
The Problem: Those of us that used other Samsung phones maybe frustrated by the fact that the menu button is missing, but is now replaced with a Recent apps button which is pretty standard for most other Android phones.
What you can do:
-For many modern apps you can swipe to reveal a three-dot menu button that developers add in.
-If the apps you are using do not have this button you can simply long press the Recent appssoft-key, and that will bring up the menu for you.

6. The Dreaded Dead Pixel
note 4 dead issue
The Problem: While using your phone you may notice a few dead pixels, this is a pretty common problem among smartphones.
What you can do:
-There are apps that you can search the Play store for like Dead Pixel Detect and Fix, one of them may correct the dead pixels.
-If it is really bad you can try your hand at replacing the LCD screen and digitizer.
-If neither of those suggestions help you out then you may want to bring the phone back to the retailer, carrier or Samsung for a replacement.
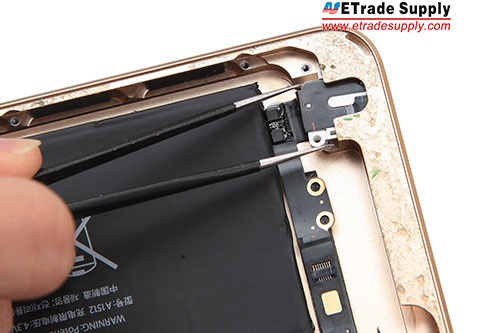
5.  Battery Life
The Problem: As with most Samsung phones many users have complained about problems with battery life. This one can be kind of tricky as there are so many factors that affect how long a battery can last. Also keep in mind that new batteries can take a few days of use to fully activate.
What you can do:
-You can check out our write up on 15 ways to extend battery life for some tips on how to reduce strain on your battery.
-You can always buy a new Note 4 battery, or get a secondary to switch throughout the day.
-In the settings menu under Power Saving there are a few options you can try configuring.
Other potential solutions:
-We recommend restarting your Note 4 periodically.
-In the settings menu under Battery you can see the battery usage. This page will outline how much power each app and service is using giving you a clear view of where all your power is going. Once you identify what apps and services are using the most power you can decide how you want to deal with it.
-Another option is if you have rooted your Note 4 you can remove a lot of the bloatware installed by your service provider and Samsung.
-As a final option you could also factory reset your phone and start over fresh.

4. Back Button Sensitivity
The Problem: Some users have complained about the capacitive Back button stating that it is not sensitive enough, and not registering all their touches.
What you can do:
-This is related to a hardware issue, and you will need to have the front LCD assembly. If you are unable to do this yourself then we recommend you to take your phone to a repair shop or your retailer, carrier or Samsung to get it replaced.

3. Lag
The Problem: Samsung’s Note 4 experiences a certain amount of lag that many users have complained about. The phone experiences random intermittent short pauses or “stutters” when opening certain apps, returning to the home screen, or just while typing away on the keyboard. Others have reported more widespread stuttering when bring the phone out of sleep and during general navigation of the device. Some have reported that the Recent Apps page as a big problem spot.
What you can do:
-S Voice seems to be a culprit of some of the lag. We recommend turning off the “open via home key” option, which can be found in the Options section of the S Voice options.
-Under the Settings menu you will see an About device selection, tap it seven times. Go back to the Settings menu and you should have a new option, Developer options. Tap that option and look for Window animation scale, Transition animation scale, and Animator duration scale. Turn all of these down to 0.5 from 1 (or even set them to 0).
-If you are pretty tech savvy or have a phone savvy friend you can always change to a better UI
Other potential solutions:
-Samsung is constantly releasing updates to their phones, so make sure your device is up to date.

2. Bluetooth Won’t Connect
The Problem: Many Note 4 owners have reported issues with getting Bluetooth devices and accessories to connect. Either the phone refuses the connection altogether, or after connecting it only offers limited functionality.
What you can do:
-Check the manufacturer’s manual for the Bluetooth device to find out how to reset the connections. There is a chance the device has reached its connection limit, and old devices need to be removed.
-While you have the manual in front of you double check the connection procedure to make sure you have gotten it right. You might have simply just remembered it wrong.
-In the Settings menu check the Bluetooth options, and check to see if there is anything that needs adjusting.
-There are also some Bluetooth connectivity apps that you can try to see if they help out.

1. Wi-Fi Connection Issues
The Problem: Often times when a near smartphone or device comes out many users report issues with Wi-Fi connectivity or speeds.
What you can do:
-First thing to try would be to turn both your router and the Wi-Fi on your phone off for a few minutes. Once they have sat for a few turn them back on, and retry the connection.
-Under Settings>Power saving you will want to check and make sure that having low battery life isn’t causing your Note 4 to automatically restrict Wi-Fi in anyway.
-In the Settings> Wi-Fi menu click on the connection you are trying to connect to, select forget and re-enter the connection details again.
-There are a few apps you can use like Wi-Fi Analyzer to check and see if there is any interference from nearby routers. If so you can try changing the channel on your router.
-Take a look at the settings on your router. Make sure that MAC filtering isn’t on, or add your Note 4’s MAC address, which you’ll find in Wi-Fi > Settings > Advanced.
-Make sure that your router firmware is fully up to date.


Friday, December 26, 2014

How to Tear Down/ Take Apart/ Disassemble iPad Mini 3 within 10 Minutes

use this coupon code: ETS7H4XW for extra discounts on www.etradesupply.com for order over $50, and it won’t be expire until Feb. 10th, 2015.


iPad mini 3 sports the touch ID, but other parts are not upgraded. How to replace parts of iPad mini 3 within 10 minutes? Let me show you step by step.
No other exciting features were added to the iPad mini 3 except the fingerprint sensor, but will the sensor cost you more time and effort to replace the screen? Apple has combined the digitizer and LCD screen of iPad air 2 together, which raise the repair cost significantly. However, the digitizer and LCD screen of iPad mini 3 are separated, which not only reduce the difficulty but also reduce the cost of DIY repair. Here we will walk you through a 10 min easy step by step screen repair guide for the iPad mini 3.
 Note: Many people are suspicious about the real time cost of replacing the iPad mini 3 broken screen. We have to say that the repair time is depended on the skill of people who does. A professional repair technician can finish the repair in less than 10 mins, but for people who never did related DIY repair, it sure will cost them more time.
Tools needed:
PH000 Screwdriver
A Pair of  Tweezers
Hair Drier/Heat Gun (recommended)
Plastic Case Opening Tool
Suction Cup
 Step 1. Please cover the shattered iPad mini 3 screen with transparent adhesive tape, which will protect your fingers from the tiny glass during the repair work.
 Step 2. Shut off your iPad mini 3 before disassembly. (It may cause short circuit while your power is on during the repair work)
 1.Use the hair drier/heat gun to heat the iPad mini 3 edge up for 5 minutes to melt the adhesive. (Starts from the front part; both the glass and the metal back plate will be heated up, so please be careful when touching them)
1.Use the hair drier to heat the iPad mini 3 edge to melt the adhesive.
 2.Use the suction cup to pry up the panel a little bit and then insert a plastic opening tool to separate the digitizer from the rest part. (Much strength can be used here because the glass are adhered to the frame tightly)
2.Use the suction cup to pry up the panel and insert an opening tool
 3.Use the suction cup and opening tool to slide across the edges and pry up the panel slowly and carefully.
3.Use the suction cup and opening tool to pry up the panel slowly and carefully.
 4.Open the panel and undo the 4 screws in the LCD.
4.Open the panel and undo the 4 screws in the LCD
 5.Remove 7 screws in the metal bracket.
5.Remove 7 screws in the metal bracket
 6.Remove 4 screws in the mental bracket and 1 screw in the motherboard.
6.Remove 4 screws in the mental bracket and 1 screw in the motherboard.
 7.Remove the metal bracket and disconnect 4 flex cables connecting to the logic board. The digitizer, LCD screen and metal plate are now removed from the rear housing assembly. If you are trying to replace the broken iPad mini 3 digitizer, by here is what you all need to do.
7..Remove the metal bracket and disconnect 4 flex cables connecting to the logic board
8.Pry up the 2 antennas connecting to the logic board.
 9.Remove 3 screws in the left bracket.
9.Remove 3 screws in the left bracket.
 10.Remove 4 screws in the right bracket.
10.Remove 4 screws in the right bracket
 11.Remove 6 screws in the charging port.
11.Remove 6 screws in the charging port.
 12.Remove the louder speaker modules in the bottom.
12.Remove the louder speaker modules in the bottom.
13.Disconnect 4 flex cables connecting to mother board and remove the front facing camera. (Notice: the front facing camera is fixed on the back housing by adhesive. The front facing camera flex cable is clipped in. Handle carefully and gently.)
13.Disconnect 4 flex cables connecting to mother board
 14.Disconnect the sensor flex cable to the mother board.(Notice: the flex cable is clipped to the earphone jack flex cable.)
13.disconnect the sensor flex cable to the mother board.
 15.Pull out the charging port.
14.Pull out the charging port
 16.Remove the mother board.
15.Remove the mother board.
 17.Pull out the earphone jack flex cable.
16.Pull out the earphone jack flex cable.
 18.Undo 2 screws in the side key bracket.
17.Undo 2 screws in the side key bracket
 19.Undo 2 screws in the power button bracket.
18.Undo 2 screws in the power button bracket.
 20.Remove the side key and power button. (Because the battery is fixed on the back housing tightly by strong adhesive. We do not recommend to remove it yourself.)
19.Remove the side key and power button.

Monday, December 22, 2014

The Cost Of Repairing A Broken iPhone 6 Screen

http://www.etradesupply.com/blog/the-cost-of-repairing-a-broken-iphone-6-screen/

use this coupon code: ETS7H4XW for extra discounts on www.etradesupply.com for order over $50, and it won’t be expire until Feb. 10th, 2015. 

In September of 2014, an Australian named Jack Cooksey was the first to buy an iPhone 6 from Perth’s flagship store, as well as the first one to drop it right after he opened the box. During those first few days till now, floods of news have sprung up reporting cracked iPhone 6 screens. Consequently, users may wonder how much does it cost to repair a smashed iPhone 6 screen, here is a breakdown of the DIY costs to repair a broken iPhone 6 screen for your reference.
 iphone 6 cracked screen cost
1. Cost of replacing a front glass panel.
It doesn’t cost that much to replace only the glass on an iPhone 6, granted your phone’s screen is cracked but the display and touch still work as usual. However, it is a difficult and high-risk repair, and you run the risk of further breaking your screen if you’re not a professional or are unfamiliar to cellphone repair. A brand new and original iPhone 6 Glass Lens replacement is about $10.

2. Cost of repairing a touch screen.
As the touch screen is hermetically attached to the LCD display, the whole LCD assembly should be replaced considering the difficulty and risk, if your iPhone 6’s touch screen failed to respond after the damage it would be a much safer choice to replace the whole assembly. It is $160 to buy a replacement brand new original iPhone 6 LCD Screen and Digitizer Assembly with Frame.

3. Cost of repairing an LCD display.
The same difficulty and risk go into replacing an LCD as with replacing a touch screen. We recommend replacing the whole assembly if your iPhone 6’s screen goes black or displays the wrong colors after the damage. A replacement iPhone 6 LCD Screen and Digitizer Assembly with Frame will cost you less than $160.

If you want to replace the home button, you will need to buy the iPhone 6 LCD Screen and Digitizer Assembly with Frame and Home Button as well. This item is more expensive, about $200. However, with this item, the replacement work is much easier and less risky to perform. Please note that the replacement iPhone 6 home button supports all functions except for unlocking the screen with fingerprint, as the Touch ID sensor is tied to the unique logic board inside each iPhone.

4. DIY repair tools required.
Screwdriver
●  Plastic Spudger Tool
●  Tweezers
●  Case Opening Tool
●  Suction Cup Tool
You may also buy an iPhone repair tool kit instead, which covers all the tools you would need to repair an iPhone or iPad.

Friday, December 19, 2014

Top 5 Issues And Potential Solutions To Sony Xperia Z3

http://www.etradesupply.com/blog/top-5-issues-and-potential-solutions-to-sony-xperia-z3/


Everyone can use this coupon code: ETSO4BG0 for extra discounts on www.etradesupply.com for order over $50, and it won’t be expire until Dec 31, 2014.

3 months have passed since the Sony Xperia Z3 hit the market in September of 2014. Now it’s time to report what issues have arisen on this device among users. Here we have collected the top 5 issues on the Xperia Z3.
#1 Pink Spot
This is not the first time that Sony Xperia Z flagship smartphone users are plagued with camera problems. Most of these camera problems are caused by overheating which can be solved by cooling down the devices. However, there’re still no exact explanations on this “Pink Spot” problem appearing on the Xperia Z3’s rear facing camera.
Thus, if you’re encountering this “Pink Spot” problem with your Xperia Z3’s camera, contacting your local Sony service center to get a replacement maybe the best choice.
#2 Waterproof Failing
Sony’s Xperia Z3 is IP68 certified dust proof and IP65 certified water resistant, that means you can put the device into water over 1 meter deep for 30 minutes. Yet, users complain that their waterproof Xperia Z3 failed to work as expected. Some said that the touch screen refused to response under water when taking pictures or videos, while some found that the earphone jack wasn’t sealed and water permeated in.
For this, we’d suggest not to keep your device in water for too long, and check the seal for the earphone jack and side buttons carefully before using it in the swimming pool.
If you have an interest in how Sony makes a waterproof phone, please read this article: Sony Official Reveals the Waterproof Cellphone Repair Process
xperia-z3-waterproof
#3 Self-Cracking Screen
The Xperia Z3 features an IPS LCD capacitive touch screen protected by shatter proof glass. While at least one user has claimed his or her device’s screen cracked by itself according to a GizmoBoltreport, whether or not it cracked on its own or through some kind of bump, the broken Xperia Z3 screens still have to be replaced with a new one so as to get this problem solved.
#4 Bent Frame
Apple is not alone in the “Bendgate” event this year, according to a recent report by a Sony Xperia Z3 owner his handset frame was bent as shown in the picture below, even though he didn’t put the device into his back pocket or tight fitting jeans.
 xperia-z3-bent
Earlier reports have also pointed out that Xperia Z1’s frame is in danger of warping as well. However, similar to the crack screen issue, perhaps replacing the bent Xperia Z3 frame with a new one is the best choice of action.
#5 Screen Flickering/Static
Although it’s rated as one of the top issues, screen static is rarely reported by users. According to some reports on the forums, the Xperia Z3 screen was “flickering” or showed “colourful static for a split second and sometimes even longer” at random. Apparently, this glitch happens especially when using the camera or watching a video. Evidence suggests that this is a hardware fault rather than a software problem. So you’ll have to contact Sony’s service center or a repair center to solve the problem.