Showing posts with label ipad air 2. Show all posts

Monday, January 5, 2015

iPad Air 2 VS Nexus 9, Which Is Better?

this coupon code: ETS7H4XW for extra discounts on www.etradesupply.com for order over $50, and it won’t be expire until Feb. 10th, 2015.

ipad air 2 vs nexus 9 2
Both iPad Air 2 and Nexus 9 are celeb tablets of 2014, comparison articles and videos about these two devices are easily founded when searching on Google. However, some still have no idea on which one is better even after reading the long descriptions or watching the videos. So we gather the similarities and differences between iPad Air 2 and Nexus 9 into a chart, trying to make it easier to understand.
 
iPad Air 2
Nexus 9
Release Date
October, 2014
November, 2014
Screen Size
9.7 inches
8.9 inches
Dimensions
240 x 169.5 x 6.1 mm
228.2 x 153.7 x 8 mm
Weight
437 g (Wi-Fi)
444 g (3G/LTE)
425 g (Wi-Fi)
436 g (3G/LTE)
Back Panel
Aluminum
Plastic + Metal
Display
LED-backlit IPS LCD, capacitive touchscreen
IPS LCD capacitive touchscreen
Glass
Scratch-resistant glass, oleophobic coating
Corning Gorilla Glass 3
LCD Pixels
1536 x 2048
1536 x 2048
ROM
16 GB, 64 GB, 128 GB
16 GB (Wi-Fi); 32 GB (LTE)
RAM
2 GB
2 GB
Extended Memory
No
No
OS
iOS 8.1
Android OS, v5.0 (Lollipop)
Chipset
Apple A8X
Nvidia Tegra K1
CPU
Triple-core 1.5 GHz
Dual-core 2.3 GHz Denver
Front Camera
8 MP, 3264 x 2448 pixels, autofocus
8 MP, 3264 x 2448 pixels, autofocus, LED flash
Back Camera
1.2 MP, 720p
1.6 MP, 720p
Battery
Non-removable Li-Po 7340 mAh battery
Non-removable Li-Po 6700 mAh battery
Colors
Space Gray, Silver, Gold
Indigo Black, Lunar White, Sand
Price
(2-year Contract)
16 GB (Wi-Fi) $499
64 GB (Wi-Fi) $599
128 GB (Wi-Fi) $699
16 GB (Wi-Fi) $399
32 GB (Wi-Fi) $479
The biggest reason why Nexus 9 is chosen to compare with iPad Air 2 is that the Nexus 9’s 4:3 aspect ratio makes it looks like an iPad at the first glance. If a 9.7-inch iPad is too big while a 7.9-inch iPad Mini is too small for you, then the 8.9-inch Nexus 9 is a good substitute instead. The Nexus 9 is a pretty excellent tablet compared with other Android tablets and the price is much more attractive than an iPad. However, if you’re looking for a tablet with better performance in the long term, than the iPad Air 2 maybe a better choice.


Thursday, December 18, 2014

How to Replace Your Broken iPad Air 2 Screens within 10 Minutes

http://www.etradesupply.com/blog/how-to-replace-your-broken-ipad-air-2-screens-withini-10-minutes/

use this coupon code: ETSO4BG0 for extra discounts on www.etradesupply.com for order over $50, and it won’t be expire until Dec 31, 2014.

iPad Air 2 is the thinnest but most powerful iPad ever which means much lesser room has been left for the inner parts. Will that cause it more difficult to be fixed? As a tablet with a 9.7 inches screen, the most possible damage is breaking the screen accidently. Let Apple to replace your broken iPad air 2 screen will cost you as high as $379, which is twice as much as a 10 minutes DIY screen replacement (Buy the iPad air 2 LCD and digitizer screen assembly here ). Here we will walk you through a step by step iPad air 2 screen replacement guide and hope this could help.
Tools Needed:
A pair of Tweezers
T4 Phillips Screwdriver
Suction Cup
Case Opening Tool
1.Heated the iPad air 2 screen edge up to melt the adhesive for 3 minutes, then pry up the screen with the suction cup and case opening tool. (If your screen shattered badly, please use a plastic adhesive tape to cover it in order not to make any further damage)
 1.pry up the screen with the suction cup
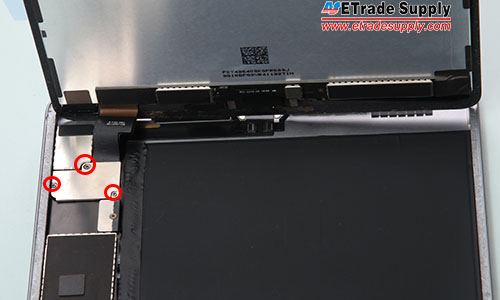
2.After the iPad air 2 screen assembly has been opened, undo 3 screws and remove the metal bracket covering the flex cables. 
2.Undo 3 screws and remove the metal bracket
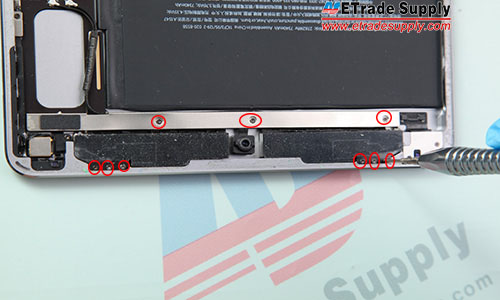
3.Undo 6 screws holding the antenna module and 3 screws in the metal bar.
 3.Undo 6 screws in the antenna module and 3 screws in the metal bar
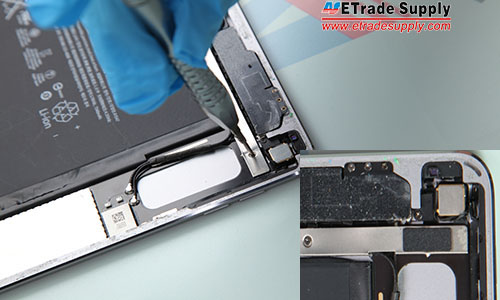
4.Peel off the adhesive and undo the screw under the adhesive.
 4.Peel off the adhesive and undo the screw under the adhesive.
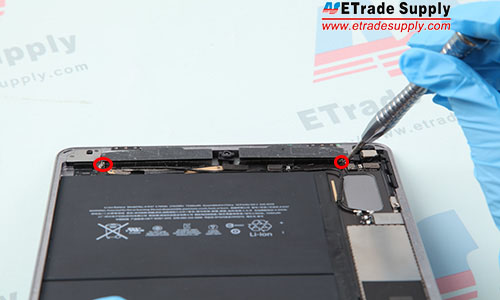
5.Undo 2 screws inside the bracket.
5.Undo 2 screws inside the bracket
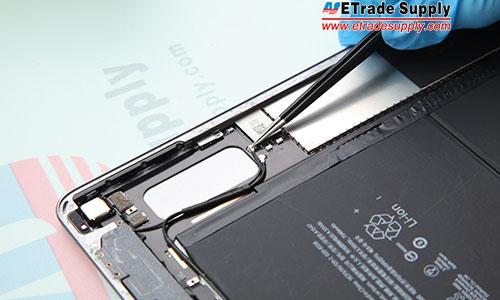
6.Disconnect the antenna, then remove the antenna module.
 6.Disconnect the antenna, then remove the antenna module
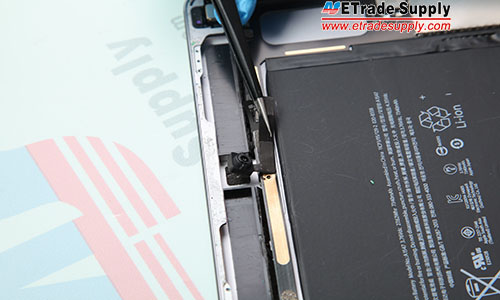
7.Disconnect the front facing camera flex cable and remove the front facing camera.
 7.Disconnect the front facing camera flex cable and remove the front facing camera
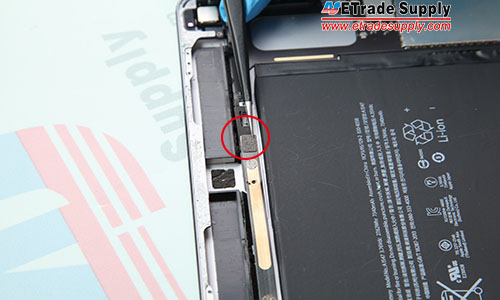
8.Disconnect the headphone jack flex cable.
 8.Disconnect the headphone jack flex cable
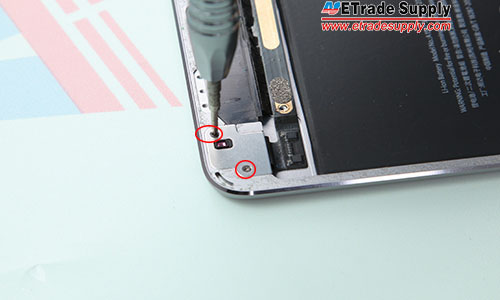
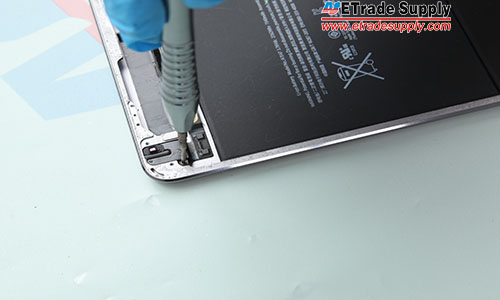
9.Undo 2 screws in the headphone jack bracket.
 9.Undo 2 screws in the headphone jack bracket
10.Undo the screw under the bracket.
 10.Undo the screw under the bracket
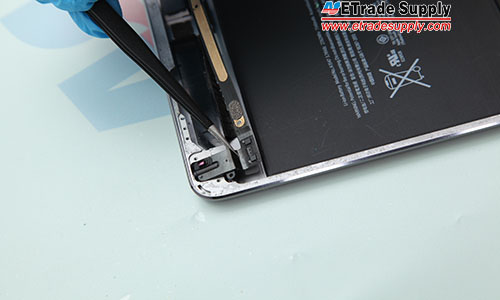
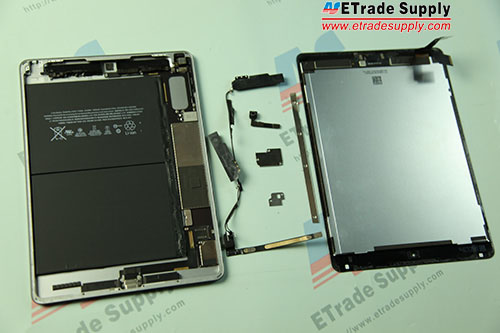
11.Remove the headphone jack flex cable assembly.
 11.Remove the headphone jack flex cable assembly
Because the mother board is stuck to the back housing by strong adhesive, it’s high risk to remove the motherboard and special tools and skills are needed. We don’t recommend people to tear down the part by himself (herself). So does the battery.
1